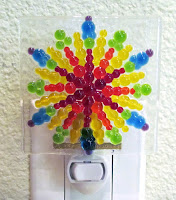
Just in time for the darkest time of the year, we've introduced our new rainbow night lights!
These happy little plug in lights can help you find your way around the house at night without blinding you with too much light.
To make these. we first have to create the little glass balls - believe it or not, you can't just buy those in a store! To create the balls, small broken bits of glass (called "frit") are laid out on a kiln shelf and heated to 1490 degrees Fahrenheit.
At that temperature, the glass becomes liquid, and its surface tension overcomes gravity - it balls up into perfect little round drops. After careful cooling, the shards have turned into frit balls:
The frit balls are carefully collected and cleaned, then sorted into containers according to color.
Next, I cut a clear piece of glass into a 3 by 3.5 inch rectangle to serve as a background. The glass is cleaned meticulously, to make sure that no dust or oil sticks to its surface - contaminants would make the glass cloudy when it gets fused.
Now, finally, the fun task of assembling the pattern can begin. I have a guide that marks the center and the main symmetry lines of my pattern; this goes under my background piece to help me keep everything aligned. Then I bring out my little containers with the frit balls, and I start making a pattern from the center outwards, I do not usually have a finished pattern in mind; rather I start with a general color scheme and a rough geometric layout, and see where my imagination (and my fingers) take me.
The piece then goes back into the kiln, and is heated to a temperature of at least 1375 degrees, This fuses the frit balls to the surface, making the piece one single piece of glass.
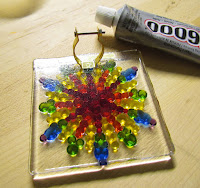
After the glass has cooled again, the last step is to glue the metal brace onto the back of the piece with jeweler's glue.
This needs to dry over night, and then it is finally time to assemble the night light! The brace is attached to the light hardware with a tiny nut and bolt.
The final result:


